At the behest of my brother, I have created a blog for the recipes that I create. I know in the past that I have made some and put them up here, but, I like the Wordpress format better then Blogger. I briefly thought that I'd be able to keep up with multiple blogs, but I just don't that that will be the case. If you like what I've done in the past, I urge you to check out my new site. It has better pictures too!
KirBear's Kitchen
Tuesday, November 22, 2016


Thursday, September 15, 2016
Hello Again!
Hello all. I know I disappeared for three years. So...let's see. When last I wrote I was doing the GAPS diet for my psoriasis. I continued on with GAPS for a total of nine months. In September 2013, I switched to a Paleo diet and continued to lose another twenty pounds so my current weight is 123 pounds.
I've been quite content on a Paleo/low carb diet. It didn't cure all of my skin issues. I discovered that I am sensitive to foods that are high in histamines and so I have to watch what I eat. I also did some NAET treatments (Nupridad's Allergy Elimination Technique). NAET draws on accupuncture, accupressure, and kinesiology. It's sounds crazy and voodoo, but for me it worked. I haven't had any rash return on my hands, which is amazing. I will still get psoriatic type break outs on my knees with a lovely combination of uticaria, but it is not nearly as bad as it was a few years ago. If I am a good girl and watch my histamine intake I can keep my skin 90% clear.
Aside from my skin and diet issues, I've been keeping up with my gardening. Here's what my garden looked like in July.

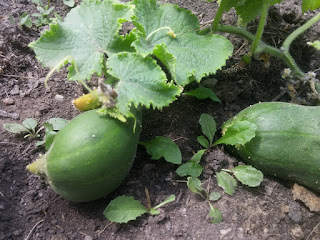

Most of these plants have been harvested, and this year I am trying to get more out of my garden, so I planted fall/winter vegetables. This includes parsnips, leeks, peas, spinach, cabbage, and beets. The plants have just started to come up and will need to be thinned out and weeded before I take pictures. That'll probably happen some time next week.
 |
| This is what I wore to my grandmother's repass in May 2016. |
Aside from my skin and diet issues, I've been keeping up with my gardening. Here's what my garden looked like in July.


Most of these plants have been harvested, and this year I am trying to get more out of my garden, so I planted fall/winter vegetables. This includes parsnips, leeks, peas, spinach, cabbage, and beets. The plants have just started to come up and will need to be thinned out and weeded before I take pictures. That'll probably happen some time next week.
Sunday, April 28, 2013
GAPs Diet Update: 4 Months Down
As April comes to a close, so does my fourth straight month on the GAPs Diet. There have been good days and bad days. But through all the trials, like having to make normal chocolate chip cookies (or anything with chocolate for that matter) for the hubby to take into work, the diet on the whole is helping my psoriasis to heal. A lot.
Here are pictures from last year after being diagnosed with psoriasis.


Here is what they look like today.

 Normal! My hands look normal! I still have some patches elsewhere that are healing as well. Pretty soon I will be all normal externally.
And here's what I looked like before GAPs:
 And here is what I look like today:
I feel pretty good, but a lot of the time I feel like I'm not eating enough fats. I put coconut oil in my soup, and drench veggies in ghee, but I still don't feel as satiated as if I could use butter, cream, or sour cream. I'm eagerly waiting for the day I can start to reintroduce dairy. It will open up so many more recipes and add additional fats to my diet.
I also still have an issue with having too much coconut (I think it's related to salicylates), which limits my options and the fats that I can eat. I know that in time things will get better.
Here are pictures from last year after being diagnosed with psoriasis.


Here is what they look like today.


And here's what I looked like before GAPs:

 |
| I know, I know, I didn't do a full smile. |
I also still have an issue with having too much coconut (I think it's related to salicylates), which limits my options and the fats that I can eat. I know that in time things will get better.
Sunday, March 31, 2013
Plugging Along
It's been over a month since my last update, and I have much improved. My face actually cleared all the way up and my hands are just about completely normal. I did have a minor setback earlier this week, where my face did break out in a rash, but it's almost all healed. I had some artichoke soup- and that set off the reaction. Well, it was either that (I had not had artichoke soup in several weeks and is the newest thing in my diet) or I just simply went over board with salicylate rich foods. In either case, I will be much more mindful for the time being of how many heavy salicylate foods I have in a day. Once my symptoms clear up, I will try reintroducing artichoke in again.
That tangent aside, I am stable at 139-140 lbs. and my skin on the whole is clearing up. I am very encouraged by this. GAPs it would appear is working for me! Pictures of my progress coming soon!
I've also decided to make another blog (you're all laughing I know, because I'm SO good about updating this one). I'm still going to make another blog, and I think I'll be more apt to update it. The new blog can be found at the following address: gapsrecipereview.blogspot.com.
That tangent aside, I am stable at 139-140 lbs. and my skin on the whole is clearing up. I am very encouraged by this. GAPs it would appear is working for me! Pictures of my progress coming soon!
I've also decided to make another blog (you're all laughing I know, because I'm SO good about updating this one). I'm still going to make another blog, and I think I'll be more apt to update it. The new blog can be found at the following address: gapsrecipereview.blogspot.com.
Thursday, February 14, 2013
GAPs Update
I've been plugging along on the GAPs diet. About two weeks ago, I felt it was time to move from the GAPs Intro diet onto the full GAPs diet. Once you get to Phase 6, there really isn't much difference between the two anyway.
The psoriasis is finally starting to clear up on my hands, and the patches around my eyes are gone. Today however, after having my morning glass of mineral water, I started having an itching sensation where the rash patches normal reside around my eyes. This has been consistently happening every week-on Thursdays oddly enough- and I'm not sure what's causing it. In an effort to try and find the reason (if any) I'll be starting a food journal. Yes, I know I probably should have been doing that from the beginning, but it's annoying to document everything you eat. I think it might possibly just be my body working toxins out. I don't know. Only time will tell.
On the upside, an unintended side effect of going on GAPs is that I'm easily down 10 lbs. I haven't weighed myself in about a week and a half (I'll be doing that again soon), but that last time I was on a scale it was 144 lbs, and that was after having some mineral water. I didn't go on GAPs to lose weight, I went on it to cure my food sensitivities and psoriasis, but I'll take it.
The psoriasis is finally starting to clear up on my hands, and the patches around my eyes are gone. Today however, after having my morning glass of mineral water, I started having an itching sensation where the rash patches normal reside around my eyes. This has been consistently happening every week-on Thursdays oddly enough- and I'm not sure what's causing it. In an effort to try and find the reason (if any) I'll be starting a food journal. Yes, I know I probably should have been doing that from the beginning, but it's annoying to document everything you eat. I think it might possibly just be my body working toxins out. I don't know. Only time will tell.
On the upside, an unintended side effect of going on GAPs is that I'm easily down 10 lbs. I haven't weighed myself in about a week and a half (I'll be doing that again soon), but that last time I was on a scale it was 144 lbs, and that was after having some mineral water. I didn't go on GAPs to lose weight, I went on it to cure my food sensitivities and psoriasis, but I'll take it.
 |
| Myself in August 2012 at a family event. |
 |
| 144 lbs in January 2013. |
Monday, January 21, 2013
Day 12
Everything is going well on the introductory diet. I'm loving the fresh juice. Fresh carrot juice tasted really good, but when I could finally introduce apple juice, wow. It's amazing! So sweet! I just kinda ran out of apples and carrots, and that is a sorry day. I'll be headed to Costco tomorrow to stock up on some organic carrots and apples.
I'm going to be trying some almond bread today. I'm a little worried that I'll scrape up my food processor bowl, but I need the flour. I'll get over it. At some point. I like to keep my kitchen gadgets pretty, if you couldn't tell.
Today is the first day in a while that the red around my eyes is really a lot lighter. It seems to finally be healing. I'm hoping that after that goes away then the rest will start to disappear.
The other plus side...I weighed 146.4 lbs. yesterday. I haven't weighed that since college. I'm completely okay with that.
All in all, the cravings have subsided, my skin is clearing, and I weigh less. I can't really complain at this point.
I'm in phase 5, pretty soon I'll be moving to phase 6. After that I'll be on GAPs proper. I can't wait to have some coconut flour blueberry muffins.
I'm going to be trying some almond bread today. I'm a little worried that I'll scrape up my food processor bowl, but I need the flour. I'll get over it. At some point. I like to keep my kitchen gadgets pretty, if you couldn't tell.
Today is the first day in a while that the red around my eyes is really a lot lighter. It seems to finally be healing. I'm hoping that after that goes away then the rest will start to disappear.
The other plus side...I weighed 146.4 lbs. yesterday. I haven't weighed that since college. I'm completely okay with that.
All in all, the cravings have subsided, my skin is clearing, and I weigh less. I can't really complain at this point.
I'm in phase 5, pretty soon I'll be moving to phase 6. After that I'll be on GAPs proper. I can't wait to have some coconut flour blueberry muffins.
Thursday, January 17, 2013
Artichoke Soup and Carrot Juice
I am continuing on in my GAPs introductory diet, and am doing well. I was feeling really good with tons of energy, and then I upped my probiotic increase. That predictably caused more die off, which is leaving me tired and the psoriasis spots redder, but it must be done!
On the plus side, I made a really delicious soup that my mom told me how to make. It's a creamed artichoke soup. I made it as follows (it was to the best of my recollection):
3 cans of artichokes (drained of liquid)
2 quarts of chicken stock
1 large garlic clove
Ghee
I put the garlic clove through a garlic press, and then sauteed it in ghee. Then I added the canned artichoke and chicken stock. I let that simmer for about 15 minutes and then pureed it. It was awesome! I'm going to be making it again, and this time I'll be trying it with fresh artichokes.
I also made some carrot juice with my new juicer. Wow! Did it taste good! I used organic carrots and they are very sweet. I could only enjoy 2 tsps. per the GAPs diet introduction. Tomorrow I should be able to enjoy more.
On the plus side, I made a really delicious soup that my mom told me how to make. It's a creamed artichoke soup. I made it as follows (it was to the best of my recollection):
3 cans of artichokes (drained of liquid)
2 quarts of chicken stock
1 large garlic clove
Ghee
I put the garlic clove through a garlic press, and then sauteed it in ghee. Then I added the canned artichoke and chicken stock. I let that simmer for about 15 minutes and then pureed it. It was awesome! I'm going to be making it again, and this time I'll be trying it with fresh artichokes.
I also made some carrot juice with my new juicer. Wow! Did it taste good! I used organic carrots and they are very sweet. I could only enjoy 2 tsps. per the GAPs diet introduction. Tomorrow I should be able to enjoy more.
Sunday, January 13, 2013
I'm on Day 4
As per usual, it's been a while since I last blogged. That's how I roll apparently.
Well, since the last time I blogged there isn't anything terribly new and exciting. My psoriasis never really went into full remission except for the week I was on a Bermudan cruise, go figure. Since the cruise (in May) I started to develop more food sensitivities, and after messing around with avoiding salicylates (a phenol found in 80% of all foods, and the compound that makes food good). I had some slight success, but never any full remission. So, after doing some research and reading/listening to some interviews with Dr. Natasha Campbell-McBride, the author of Gut and Psychology Syndrome, I've decided to go on the GAPs protocol.
The reason for this decision is because no matter what restrictive diet I could put myself on, I would eventually have less and less food that I could eat. This would be the case because at the root of all my problems is a leaky gut and bad gut flora. The GAPs protocol is designed to heal the gut, and GI tract.
So, there's a part of the GAPs diet that is called the GAPs Introduction Diet. It really helps to speed up the healing in the gut. This is because the diet is pretty restrictive, but it doesn't last indefinitely. I am currently on Phase 3 of the Introduction diet. I have been on this diet for 4 days. I'm not going to lie. It has been really really hard. I thought "oh soup stock, boiled meat, I can do that." I had no idea how I would be feeling by doing this. I stayed on Phase one for 3 days. That was really hard. I essentially had chicken soup, boiled cauliflower, and stock. I had to deviate from the diet by using coconut oil in my soup to help to satisfy my hunger. The only fat that's allowed in the first few phases is duck fat, but since we are a one car family, I had to do what I had to do.
The other awesome mistake I've made is started probiotics on day one of Phase one. Apparently from what I've read since then, you are supposed to start probiotics on Phase four to help control the die off. Well, since I didn't do that, I'm having some die off. With all the die off, I do see some improvement in the psoriasis on my knee and my hand.
I can honestly say, that getting to Phase three really makes this introductory diet do able. Below is the summary of what you can eat in the different phases. As you'll see, the first two phases are pretty depressing, but once I was able to start having scrambled eggs and trying out the "pancakes" (I actually made them into muffins b/c it was easier), this has become much more doable, and I feel a lot more optimistic.
You can eat on stage 1:
• Meat or fish stock
• Well boiled broccoli, cauliflower, carrots, onions, leeks
• Squash, winter and summer
• Boiled meat
• Sea salt,
• 1-2 teaspoons a day of sauerkraut juice
Stage 2
You can eat on Stage 2:
• Meat or fish stock
• Well boiled GAPS-legal vegetables (no starchy root vegetables)
• Squash, winter and summer
• Boiled meat
• Sea salt
• Fresh herbs
• Fermented vegetables; sauerkraut, kimchi, pickles
• Fermented fish
• Egg yolk, organic, carefully separated from the white
• Homemade ghee
• Stews and casseroles made with meat and vegetables
Stage 3
You can eat on Stage 3:
• Meat or fish stock
• Well boiled GAPS-legal vegetables (no starchy root vegetables)
• Squash, winter and summer
• Boiled meat
• Sea salt
• Fresh herbs
• Fermented vegetables; saurkraut, kimchi, pickles
• Fermented fish
• Egg yolk, organic, carefully separated from the white
• Homemade ghee
• Stews and casseroles made with meat and vegetables
• Ripe avocado mashed into soups, starting with 1-3 teaspoons a day
• Pancakes made with nutbutter, squash, and eggs- fried in fat or ghee, start with one a day
• Scrambled eggs made with ghee and served with avocado if tolerated and cooked vegetables.
Stage 4
You can eat on Stage 4:
• Meat or fish stock
• Well boiled GAPS-legal vegetables (no starchy root vegetables)
• Squash, winter and summer
• Boiled, roasted, or grilled meat (not burned)
• Sea salt
• Fresh herbs
• Cold pressed olive oil
• Fermented vegetables; saurkraut, kimchi, pickles
• Fermented fish
• Egg yolk, organic, carefully separated from the white
• Homemade ghee
• Stews and casseroles made with meat and vegetables
• Ripe avocado mashed into soups, starting with 1-3 teaspoons a day
• Pancakes made with nutbutter, squash, and eggs- fried in fat or ghee, start with one a day
• Scrambled eggs made with ghee and served with avocado if tolerated and cooked vegetables.
• Freshly pressed juices, start with a few tablespoons of carrot juice
• Bread made with nut flour, eggs, squash, tolerated fat, salt
You can eat on Stage 5:
• Meat or fish stock
• Raw legal vegetables, peeled
• Squash, winter and summer
• Peeled, cooked apple, pureed
• Honey, up to a couple tablespoons a day
• Boiled, roasted, or grilled meat (not burned)
• Sea salt
• Fresh herbs
• Cold pressed olive oil
• Fermented vegetables; saurkraut, kimchi, pickles
• Fermented fish
• Egg yolk, organic, carefully separated from the white
• Homemade ghee
• Stews and casseroles made with meat and vegetables
• Ripe avocado mashed into soups, starting with 1-3 teaspoons a day
• Pancakes made with nutbutter, squash, and eggs- fried in fat or ghee, start with one a day
• Scrambled eggs made with ghee and served with avocado if tolerated and cooked vegetables.
• Freshly pressed juices, carrot, mint, cabbage, lettuce, apple, pineapple, mango
• Bread made with nut flour, eggs, squash, tolerated fat, salt
Stage 6
You can eat on Stage 6:
• Meat or fish stock
• Raw legal vegetables, peeled
• Squash, winter and summer
• Peeled, raw apple
• Other fruits, raw, introduce slowly
• Honey, up to a couple tablespoons a day
• Boiled, roasted, or grilled meat (not burned)
• Sea salt
• Fresh herbs
• Cold pressed olive oil
• Fermented vegetables; saurkraut, kimchi, pickles
• Fermented fish
• Egg yolk, organic, carefully separated from the white
• Homemade ghee
• Stews and casseroles made with meat and vegetables
• Ripe avocado mashed into soups, starting with 1-3 teaspoons a day
• Pancakes made with nutbutter, squash, and eggs- fried in fat or ghee, start with one a day
• Scrambled eggs made with ghee and served with avocado if tolerated and cooked vegetables.
• Freshly pressed juices, carrot, mint, cabbage, lettuce, apple, pineapple, mango
• Bread made with nut flour, eggs, squash, tolerated fat, salt- use dates and dried fruit to sweeten.
Well, since the last time I blogged there isn't anything terribly new and exciting. My psoriasis never really went into full remission except for the week I was on a Bermudan cruise, go figure. Since the cruise (in May) I started to develop more food sensitivities, and after messing around with avoiding salicylates (a phenol found in 80% of all foods, and the compound that makes food good). I had some slight success, but never any full remission. So, after doing some research and reading/listening to some interviews with Dr. Natasha Campbell-McBride, the author of Gut and Psychology Syndrome, I've decided to go on the GAPs protocol.
The reason for this decision is because no matter what restrictive diet I could put myself on, I would eventually have less and less food that I could eat. This would be the case because at the root of all my problems is a leaky gut and bad gut flora. The GAPs protocol is designed to heal the gut, and GI tract.
So, there's a part of the GAPs diet that is called the GAPs Introduction Diet. It really helps to speed up the healing in the gut. This is because the diet is pretty restrictive, but it doesn't last indefinitely. I am currently on Phase 3 of the Introduction diet. I have been on this diet for 4 days. I'm not going to lie. It has been really really hard. I thought "oh soup stock, boiled meat, I can do that." I had no idea how I would be feeling by doing this. I stayed on Phase one for 3 days. That was really hard. I essentially had chicken soup, boiled cauliflower, and stock. I had to deviate from the diet by using coconut oil in my soup to help to satisfy my hunger. The only fat that's allowed in the first few phases is duck fat, but since we are a one car family, I had to do what I had to do.
The other awesome mistake I've made is started probiotics on day one of Phase one. Apparently from what I've read since then, you are supposed to start probiotics on Phase four to help control the die off. Well, since I didn't do that, I'm having some die off. With all the die off, I do see some improvement in the psoriasis on my knee and my hand.
I can honestly say, that getting to Phase three really makes this introductory diet do able. Below is the summary of what you can eat in the different phases. As you'll see, the first two phases are pretty depressing, but once I was able to start having scrambled eggs and trying out the "pancakes" (I actually made them into muffins b/c it was easier), this has become much more doable, and I feel a lot more optimistic.
You can eat on stage 1:
• Meat or fish stock
• Well boiled broccoli, cauliflower, carrots, onions, leeks
• Squash, winter and summer
• Boiled meat
• Sea salt,
• 1-2 teaspoons a day of sauerkraut juice
Stage 2
You can eat on Stage 2:
• Meat or fish stock
• Well boiled GAPS-legal vegetables (no starchy root vegetables)
• Squash, winter and summer
• Boiled meat
• Sea salt
• Fresh herbs
• Fermented vegetables; sauerkraut, kimchi, pickles
• Fermented fish
• Egg yolk, organic, carefully separated from the white
• Homemade ghee
• Stews and casseroles made with meat and vegetables
Stage 3
You can eat on Stage 3:
• Meat or fish stock
• Well boiled GAPS-legal vegetables (no starchy root vegetables)
• Squash, winter and summer
• Boiled meat
• Sea salt
• Fresh herbs
• Fermented vegetables; saurkraut, kimchi, pickles
• Fermented fish
• Egg yolk, organic, carefully separated from the white
• Homemade ghee
• Stews and casseroles made with meat and vegetables
• Ripe avocado mashed into soups, starting with 1-3 teaspoons a day
• Pancakes made with nutbutter, squash, and eggs- fried in fat or ghee, start with one a day
• Scrambled eggs made with ghee and served with avocado if tolerated and cooked vegetables.
Stage 4
You can eat on Stage 4:
• Meat or fish stock
• Well boiled GAPS-legal vegetables (no starchy root vegetables)
• Squash, winter and summer
• Boiled, roasted, or grilled meat (not burned)
• Sea salt
• Fresh herbs
• Cold pressed olive oil
• Fermented vegetables; saurkraut, kimchi, pickles
• Fermented fish
• Egg yolk, organic, carefully separated from the white
• Homemade ghee
• Stews and casseroles made with meat and vegetables
• Ripe avocado mashed into soups, starting with 1-3 teaspoons a day
• Pancakes made with nutbutter, squash, and eggs- fried in fat or ghee, start with one a day
• Scrambled eggs made with ghee and served with avocado if tolerated and cooked vegetables.
• Freshly pressed juices, start with a few tablespoons of carrot juice
• Bread made with nut flour, eggs, squash, tolerated fat, salt
You can eat on Stage 5:
• Meat or fish stock
• Raw legal vegetables, peeled
• Squash, winter and summer
• Peeled, cooked apple, pureed
• Honey, up to a couple tablespoons a day
• Boiled, roasted, or grilled meat (not burned)
• Sea salt
• Fresh herbs
• Cold pressed olive oil
• Fermented vegetables; saurkraut, kimchi, pickles
• Fermented fish
• Egg yolk, organic, carefully separated from the white
• Homemade ghee
• Stews and casseroles made with meat and vegetables
• Ripe avocado mashed into soups, starting with 1-3 teaspoons a day
• Pancakes made with nutbutter, squash, and eggs- fried in fat or ghee, start with one a day
• Scrambled eggs made with ghee and served with avocado if tolerated and cooked vegetables.
• Freshly pressed juices, carrot, mint, cabbage, lettuce, apple, pineapple, mango
• Bread made with nut flour, eggs, squash, tolerated fat, salt
Stage 6
You can eat on Stage 6:
• Meat or fish stock
• Raw legal vegetables, peeled
• Squash, winter and summer
• Peeled, raw apple
• Other fruits, raw, introduce slowly
• Honey, up to a couple tablespoons a day
• Boiled, roasted, or grilled meat (not burned)
• Sea salt
• Fresh herbs
• Cold pressed olive oil
• Fermented vegetables; saurkraut, kimchi, pickles
• Fermented fish
• Egg yolk, organic, carefully separated from the white
• Homemade ghee
• Stews and casseroles made with meat and vegetables
• Ripe avocado mashed into soups, starting with 1-3 teaspoons a day
• Pancakes made with nutbutter, squash, and eggs- fried in fat or ghee, start with one a day
• Scrambled eggs made with ghee and served with avocado if tolerated and cooked vegetables.
• Freshly pressed juices, carrot, mint, cabbage, lettuce, apple, pineapple, mango
• Bread made with nut flour, eggs, squash, tolerated fat, salt- use dates and dried fruit to sweeten.
Thursday, March 8, 2012
Homemade Pancake Syrup
 This recipe is so simple! It has only three ingredients, and can be made in less then five minutes.
Ingredients:
2 cups of sugar
1 3/4 cups of water
1 T of maple flavoring (also known as mapleine)
Directions:
Put sugar into pan and cover with water. Stir. Bring to boil and boil for 1 minute. Turn off the stove and mix in maple flavoring. Serve hot off the stove.

Cost to make homemade pancake syrup:
Sugar (1 lb): $.75
Maple Flavoring: $.50
Water: $0.00
Total: $1.25
This is a great alternative to pancake syrup from the store from a budget and nutrition perspective. Enjoy!
A few notes:
You can use as much as 3 cups of sugar, and you can also let the simple syrup boil for longer for a thicker pancake syrup. Also, you can start with 2 teaspoons of maple flavoring and see if that tastes mapley enough for you (3 teaspoons = 1 tablespoon). Since you are making it you can customize it to the tastes of your family!
 |
| Boiling the simple syrup. |
 |
| After the maple flavoring is mixed in. |
Wednesday, March 7, 2012
Maple Syrup vs. Imitation Syrup
True confession time: I was raised on Log Cabin, Mrs. Buttersworth, and Aunt Jemima's Syrup (and the generic equivalent). I believed it was maple syrup. Then I met my husband, who was shocked that I not only ate and enjoyed Mrs. Buttersworth, but that I also thought that real maple syrup was too sweet. During the course of our dating, I saw the error of my ways and slowly retrained my taste buds to accept what real maple syrup tasted like.
So what is the difference between maple syrup and imitation maple syrup?
What we call fake or imitation maple syrup actually has a name- pancake syrup, waffle syrup, table syrup, or just syrup. This type of syrup is not allowed to have the word maple in the name because it does not contain any amount of maple in it.
The ingredients found in real maple syrup is simply maple sap. Maple sap is simply water, sugar, and trace amounts of minerals (good ones like magnesium, zinc, and calcium).
On the other hand, the popular brands of pancake syrup usually contain the following ingredients: corn syrup, high fructose corn syrup, water, cellulose gum, caramel color, salt, sodium benzoate and sorbic acid (preservatives), artificial and natural flavors, sodium hexametaphosphate. Yikes! That's a lot of ingredients, most of which were developed in a laboratory.
Unlike the ingredients found in pancake syrup, the ingredients found in maple syrup don't require a Google search to know what you are eating. In case you were wondering that sodium hexablahblah is used as an ingredient in water softeners and detergents, which makes me as the question "Is that really safe to eat?" I think it's pretty safe to say that pancake syrup is not something you want to feed your family.
So, now that we know what's in these two syrups, let's look at how they are made. I honestly wish I could find pictures of how pancake syrup is made, but like most of the science experiment food from large companies, there are none to be found. It's probably a two fold reason. The first is because there are trade secrets that they don't want to divulge, and the second is probably because nobody would want to eat it if they saw what it looked like before it came in the pretty little bottle.
We do know the process of how real maple syrup is made. It is first gathered from maple trees beginning in late February and lasts for about six weeks. In order for the sap to come out of the tree there needs to be a very specific temperature range: roughly 40 degrees during the day and 20 degrees at night. The temperature plays an important role in the movement of the sap within the tree.
The maple trees are tapped in the trunk with a spout to allow the syrup to drip into a container. The syrup can be contained in a bucket, a jar, or even a plastic bag as seen below.
The maple sap then gets collected and put into an evaporator, where the water is boiled off and the sap is reduced into the syrup we know and love. It does need to get filtered to remove the sugar sand before it is finished and bottled.
Here's a picture of a sugarbush along the road.

The choice is simple, maple syrup is superior in both taste and nutrition. There is however a drawback to the real stuff- price. Because of the limited area and time frame from which maple syrup can be harvested and the energy expenses incurred in the reduction process, it is noticeably more expensive then pancake syrup. It's probably at least double the cost, unless you buy it at Costco, Sam's, or BJ's.
For those on a more restricted budget, I have a recipe for homemade pancake syrup that has far less ingredients (and far scarier too!), which I will be sharing in a separate post.
Also, please note that the ingredients listed above for pancake syrup came directly from the Aunt Jemima website. Additionally, Log Cabin does have a pancake syrup made with no High Fructose Corn Syrup, but it still probably has the other scary ingredients in there.
So what is the difference between maple syrup and imitation maple syrup?
What we call fake or imitation maple syrup actually has a name- pancake syrup, waffle syrup, table syrup, or just syrup. This type of syrup is not allowed to have the word maple in the name because it does not contain any amount of maple in it.
The ingredients found in real maple syrup is simply maple sap. Maple sap is simply water, sugar, and trace amounts of minerals (good ones like magnesium, zinc, and calcium).
On the other hand, the popular brands of pancake syrup usually contain the following ingredients: corn syrup, high fructose corn syrup, water, cellulose gum, caramel color, salt, sodium benzoate and sorbic acid (preservatives), artificial and natural flavors, sodium hexametaphosphate. Yikes! That's a lot of ingredients, most of which were developed in a laboratory.
Unlike the ingredients found in pancake syrup, the ingredients found in maple syrup don't require a Google search to know what you are eating. In case you were wondering that sodium hexablahblah is used as an ingredient in water softeners and detergents, which makes me as the question "Is that really safe to eat?" I think it's pretty safe to say that pancake syrup is not something you want to feed your family.
So, now that we know what's in these two syrups, let's look at how they are made. I honestly wish I could find pictures of how pancake syrup is made, but like most of the science experiment food from large companies, there are none to be found. It's probably a two fold reason. The first is because there are trade secrets that they don't want to divulge, and the second is probably because nobody would want to eat it if they saw what it looked like before it came in the pretty little bottle.
We do know the process of how real maple syrup is made. It is first gathered from maple trees beginning in late February and lasts for about six weeks. In order for the sap to come out of the tree there needs to be a very specific temperature range: roughly 40 degrees during the day and 20 degrees at night. The temperature plays an important role in the movement of the sap within the tree.
The maple trees are tapped in the trunk with a spout to allow the syrup to drip into a container. The syrup can be contained in a bucket, a jar, or even a plastic bag as seen below.
 |
| Sap dripping into a container. Taken in Holmes County, Ohio. |
 |
| Evaporator used in the production of maple syrup. |

The choice is simple, maple syrup is superior in both taste and nutrition. There is however a drawback to the real stuff- price. Because of the limited area and time frame from which maple syrup can be harvested and the energy expenses incurred in the reduction process, it is noticeably more expensive then pancake syrup. It's probably at least double the cost, unless you buy it at Costco, Sam's, or BJ's.
For those on a more restricted budget, I have a recipe for homemade pancake syrup that has far less ingredients (and far scarier too!), which I will be sharing in a separate post.
Also, please note that the ingredients listed above for pancake syrup came directly from the Aunt Jemima website. Additionally, Log Cabin does have a pancake syrup made with no High Fructose Corn Syrup, but it still probably has the other scary ingredients in there.
Saturday, March 3, 2012
Psoriasis Update
It's been a little more then month ago when I first talked about my psoriasis. I figured it was time for an update.
Beginning February 1st, I began going to a tanning salon. There are a whole host of studies that have been done showing the benefits of tanning to psoriasis. Tanning beds (with UVB lights) help the body to metabolize vitamin D, which helps to promote proper skin function. Vitamin D deficiency can also be linked to over 100 diseases (Tanning Truth). Real vitamin D is very important for our bodies.
The UV has been shown to kill T-Cells. The T-cells circulate the body looking for foreign antigens to attack. In the case of psoriasis they attack the body's own skin cells, and end up in the areas they are attacking (National Psoriasis Foundation). That is why psoriasis spots are very red. Exposing the T-Cells to UV rays not only reduces the redness significantly, but also slows down the growth of the scaling skin cells (International Eczema and Psoriasis Foundation) (Pathol 2008) (Pathol 2011).
This is not to say that tanning beds are the a silver bullet treatment or the answer to all of life's problems. There are always risks and concerns with things, and tanning beds are not exempt from that. Tanning beds have a risk of causing potential eye damage (that of course is if you look at the lights without protective eye wear), and links to melanoma. As far as the melanoma connection, there are just as many studies disproving links to UV exposure as there are proving them (Tanning Truth).
Here's the pictures from January 24, 2012. This was after switching my diet and using the topical lotions prescribed by the doctor. This also included taking vitamin D3 every morning orally:

 And here are the pictures from today. This is doing everything I was doing in January plus the tanning salon. I went twice a week for the month of February:


As you can see, there is a marked improvement in the visual appearance of my psoriasis on my hands. I had patches on the inside of both my elbows, a patch on my left shoulder, and some under my right arm. All those patches disappeared during the month of February.
As far as I am concerned, the positives of indoor tanning far outweigh the negatives.
Beginning February 1st, I began going to a tanning salon. There are a whole host of studies that have been done showing the benefits of tanning to psoriasis. Tanning beds (with UVB lights) help the body to metabolize vitamin D, which helps to promote proper skin function. Vitamin D deficiency can also be linked to over 100 diseases (Tanning Truth). Real vitamin D is very important for our bodies.
The UV has been shown to kill T-Cells. The T-cells circulate the body looking for foreign antigens to attack. In the case of psoriasis they attack the body's own skin cells, and end up in the areas they are attacking (National Psoriasis Foundation). That is why psoriasis spots are very red. Exposing the T-Cells to UV rays not only reduces the redness significantly, but also slows down the growth of the scaling skin cells (International Eczema and Psoriasis Foundation) (Pathol 2008) (Pathol 2011).
This is not to say that tanning beds are the a silver bullet treatment or the answer to all of life's problems. There are always risks and concerns with things, and tanning beds are not exempt from that. Tanning beds have a risk of causing potential eye damage (that of course is if you look at the lights without protective eye wear), and links to melanoma. As far as the melanoma connection, there are just as many studies disproving links to UV exposure as there are proving them (Tanning Truth).
Here's the pictures from January 24, 2012. This was after switching my diet and using the topical lotions prescribed by the doctor. This also included taking vitamin D3 every morning orally:


As you can see, there is a marked improvement in the visual appearance of my psoriasis on my hands. I had patches on the inside of both my elbows, a patch on my left shoulder, and some under my right arm. All those patches disappeared during the month of February.
As far as I am concerned, the positives of indoor tanning far outweigh the negatives.
Wednesday, February 22, 2012
Sheerly Simple
The home we purchased came with window dressings on all the windows- a standard practice. All the dressings were not even close to my style. The grey room (the son's room) had a black canvas curtain that had several tabs and buttons so that it could be adjusted to different lengths and styles. I replaced the curtain in that room with some spruced up sheers.
So here's what I did:
I purchased some sheers from Wal-Mart for $4.88. If you wanted plain sheer curtains you can't beat the price. Plain sheer fabric would cost more.
Then I pinned three rows of ribbons spaced out evenly on the curtain. I allowed an extra 6 inches past the top of the curtain to allow for the tab to hold the curtain up. I then sewed them on each side of the ribbon to the sheer curtain. then I folded over the extra ribbon in half, so that the tab was three inches in length.
 After I hung the curtain to see how it looked, I decided it needed a few more tabs, so I measured an additional 6 six-inch ribbons, and pinned and sewed them to the curtain- evenly spaced of course.
So here's what I did:
I purchased some sheers from Wal-Mart for $4.88. If you wanted plain sheer curtains you can't beat the price. Plain sheer fabric would cost more.
Then I pinned three rows of ribbons spaced out evenly on the curtain. I allowed an extra 6 inches past the top of the curtain to allow for the tab to hold the curtain up. I then sewed them on each side of the ribbon to the sheer curtain. then I folded over the extra ribbon in half, so that the tab was three inches in length.
 After I hung the curtain to see how it looked, I decided it needed a few more tabs, so I measured an additional 6 six-inch ribbons, and pinned and sewed them to the curtain- evenly spaced of course.
Tuesday, January 31, 2012
Mmmm Butter
After depleting the butter I purchased over the holidays, I decided it was time to tackle the butter making process. Here's what I did:
Pour 1 quart of raw cream into the KitchenAid mixer (whisk attachment), and set it on speed 4. I covered the bowl with a dampened cloth (to prevent buttermilk from flying in the whipping process), and I let it rip for about 30 minutes or so. I used the KitchenAid because my previous attempts in the food processor and blender did not work well. The food processor base become too hot and the butter that was forming became melted, and the blender just wasn't mixing the cream at the top as well as the cream at the bottom.

After the butter formed and the buttermilk was visible like so:

I began the process of rinsing the butter. I poured off the butermilk and rinsed with water repeatedly until the liquid that was poured off was clear.


Pour 1 quart of raw cream into the KitchenAid mixer (whisk attachment), and set it on speed 4. I covered the bowl with a dampened cloth (to prevent buttermilk from flying in the whipping process), and I let it rip for about 30 minutes or so. I used the KitchenAid because my previous attempts in the food processor and blender did not work well. The food processor base become too hot and the butter that was forming became melted, and the blender just wasn't mixing the cream at the top as well as the cream at the bottom.

After the butter formed and the buttermilk was visible like so:


Then I poured some water in, ran the mixer for 30 seconds to wash the butter some more, and then began pushing the butter together to squeeze out any remaining buttermilk.

Once I was satisfied that I had gotten out as much buttermilk as was physically possible, I separated out the butter into 2 ounce portions (4 tablespoons), wrapped it in parchment paper, and then froze it.
1 quart produced 1 pound of butter.
A Healthy Snack
 |
| Homemade trail mix. |
Cashews
Peanuts (one of my favorite nuts, and a cheap one too!)
Almonds
Dried cranberries
Shredded coconut
Sunflower seeds
Banana chips
Dried pineapple
I eyeballed the ingredients that I put in, putting more of the cheaper stuff in and less of the sweet stuff. The pineapple that I got at Farm Market was in fairly large chunks, so I cut it into smaller pieces. The beauty of making a trail mix at home is not only does it save you money and additives, but it also allows you to customize it.
Nuts and seeds are a good source of minerals- something we all need. All of the nuts that I put in my mix have a higher amount of magnesium then some other nuts, such as pecans or walnuts. Magnesium, is very important because it helps the body detoxify, helps prevent allergies, and helps improve skin quality and relaxation (Mercola.com).
I added the coconut because the health benefits of coconut abound.Coconut oil is one of the most saturated fats that exists, which makes it highly stable (great for cooking), highly healthy, and great for weight loss. Coconut oil is also naturally antibacterial, antimicrobial, antioxidant, and antifungal, which makes it great for your gut too (Organicfacts.net). If you want to know more about coconut oil, I suggest picking up Sally Fallon's Eat Fat Lose Fat.
Tuesday, January 24, 2012
Hello Psoriasis, my new friend
Beginning in September of last year, I developed a rash on my hands. I thought it was just some odd type of rash that would eventually go away. I tried eczema cream, coconut oil, anti-fungal cream, and lots of lotion.The new year came, and the rash was still with me. In fact, it had spread to my shoulder. I decided it was time to see the dermatologist since nothing I tried over the counter had worked.
I was diagnosed with psoriasis. I felt like I was going to cry right then and there. During the time that I had been trying to get the rash to go away by myself I had done some research. While I didn't know all the specifics of psoriasis, I did know that it was a chronic condition and one of the things I did not want to be diagnosed by a doctor.
For those who don't know, psoriasis, while a skin condition, is actually an autoimmune disease. The dysfunction in my autoimmune system causes the skin cells to produce more rapidly then they should causing the rash. It most often shows up when individuals are in their twenties (although come to find out my dad was diagnosed as a child) and about 30% of those with psoriasis have arthritis as well.
Looking back on my life, I realize now that I have had psoriasis outbreaks before. They were just never this bad. In the past I've had little spots under my arms or in the crook of my arm. Last December I had a spot on my right hand. This year I have it on my shoulder, both hands, crooks of my arms, and under my right arm.
There are some triggers for psoriasis, such as cold weather, stress, beer, and smoking. Fortunately for me, two of those main triggers are not a problem to avoid. In September at my brother's birthday party there was the perfect storm for a psoriasis flare up- had some Oktoberfest, had stress (car broke down on the highway in NJ), and was around cigarette smoke.
Below are pictures of my hands. Prior to the regime that the doctor put me on the spots were redder, drier, and a lot flakier. My right hand, especially, is looking really good.
There is also another trigger which most conventional doctors have not really recognized yet- gluten. There's a growing number of research linking either Celiac Disease or a gluten intolerance to individuals suffering from psoriasis. I cut gluten out of my diet after Christmas, and did see an improvement in the rash. So, I am now staying gluten free. I can honestly say, other then for convenience, I don't miss traditional flour all that much.
The crazy part is that since I've been gluten free for almost a month now, some things don't taste like they used to. I find Reese's Peanut Butter Cups and Pieces to be rather bland. That is nothing less then a good thing.
Now that the gluten free journey is just beginning I hope to post good GF recipes when I find them or develop them.
Hugs!
I was diagnosed with psoriasis. I felt like I was going to cry right then and there. During the time that I had been trying to get the rash to go away by myself I had done some research. While I didn't know all the specifics of psoriasis, I did know that it was a chronic condition and one of the things I did not want to be diagnosed by a doctor.
For those who don't know, psoriasis, while a skin condition, is actually an autoimmune disease. The dysfunction in my autoimmune system causes the skin cells to produce more rapidly then they should causing the rash. It most often shows up when individuals are in their twenties (although come to find out my dad was diagnosed as a child) and about 30% of those with psoriasis have arthritis as well.
Looking back on my life, I realize now that I have had psoriasis outbreaks before. They were just never this bad. In the past I've had little spots under my arms or in the crook of my arm. Last December I had a spot on my right hand. This year I have it on my shoulder, both hands, crooks of my arms, and under my right arm.
There are some triggers for psoriasis, such as cold weather, stress, beer, and smoking. Fortunately for me, two of those main triggers are not a problem to avoid. In September at my brother's birthday party there was the perfect storm for a psoriasis flare up- had some Oktoberfest, had stress (car broke down on the highway in NJ), and was around cigarette smoke.
Below are pictures of my hands. Prior to the regime that the doctor put me on the spots were redder, drier, and a lot flakier. My right hand, especially, is looking really good.
|
| Right hand, after 2 weeks and a few days of treatment. |
|
| Left hand, after 2 weeks and a few days of treatment. |
The crazy part is that since I've been gluten free for almost a month now, some things don't taste like they used to. I find Reese's Peanut Butter Cups and Pieces to be rather bland. That is nothing less then a good thing.
Now that the gluten free journey is just beginning I hope to post good GF recipes when I find them or develop them.
Hugs!
Wednesday, December 14, 2011
It's like buttah!
One of the neat things about living in Northeastern Ohio is that I am able to have access to be a part of a herdshare where I can get milk and other dairy products directly from the Amish. I love being a part of it because it allows me to be closer to my food source, and I get to help support the local agricultural industry. In addition to that, I actually own part of the herd. I have cows!
I've been a part of the herdshare for about 3 months or so, and have been really pleased with the quality of milk and cream that I am able to get.
Since I'm able to get excellent quality cream from my cows I have started to make my own butter. I must confess, it is not quite as easy as I thought....well, it is and it isn't. The actual process of making butter is exactly as easy as it seems- beat the cream until it goes from whipped cream to condensed and hard, and well, butter. To my surprise there are some slight nuances to making butter. I have only found this out through trial and error.
Here are my findings so far-
I've been a part of the herdshare for about 3 months or so, and have been really pleased with the quality of milk and cream that I am able to get.
Since I'm able to get excellent quality cream from my cows I have started to make my own butter. I must confess, it is not quite as easy as I thought....well, it is and it isn't. The actual process of making butter is exactly as easy as it seems- beat the cream until it goes from whipped cream to condensed and hard, and well, butter. To my surprise there are some slight nuances to making butter. I have only found this out through trial and error.
Here are my findings so far-
- If you whip it in a KitchenAid, be sure to cover the bowl with dishcloths. If you don't, you'll end up with buttermilk all over the place.
- A food processor isn't really the best way. It can over heat and then the butter will melt, which will not only mess up the consistency, but also make it too difficult to tell if it is in fact finished processing.
- You need to no only pour off the buttermilk, but wash the butter until all the buttermilk is gone. If you do not do a good job of washing the buttermilk, or simply omit it (as I have been doing from sheer ignorance) the butter will go bad REALLY quickly.
- There is sweet cream butter and there is cultured butter. Cultured butter is made by first letting the cream sit out at room temperature for 8 hours.
- I'm pretty sure that Sally Fallon says you can actually use that buttermilk in cooking, but it is upstairs and I am downstairs. I'll check on that later and edit this post.
Tuesday, June 21, 2011
My New Garden
As you know, I recently moved into a home. I love my home, but I hate that the seller's stopped weeding when they put the house on the market six months ago. I think I may have some of the world's tallest weeds. I may call the Guiness Book of World Records. Here are some pictures of the flower beds around the house.
I'm not done. I might be 30% done with weeding. There's just so much! I also need to find a good mulch to put out in the beds.
Before:


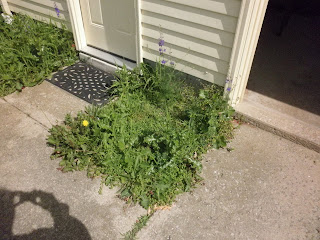

After (only some sections done):


I'm not done. I might be 30% done with weeding. There's just so much! I also need to find a good mulch to put out in the beds.
Before:
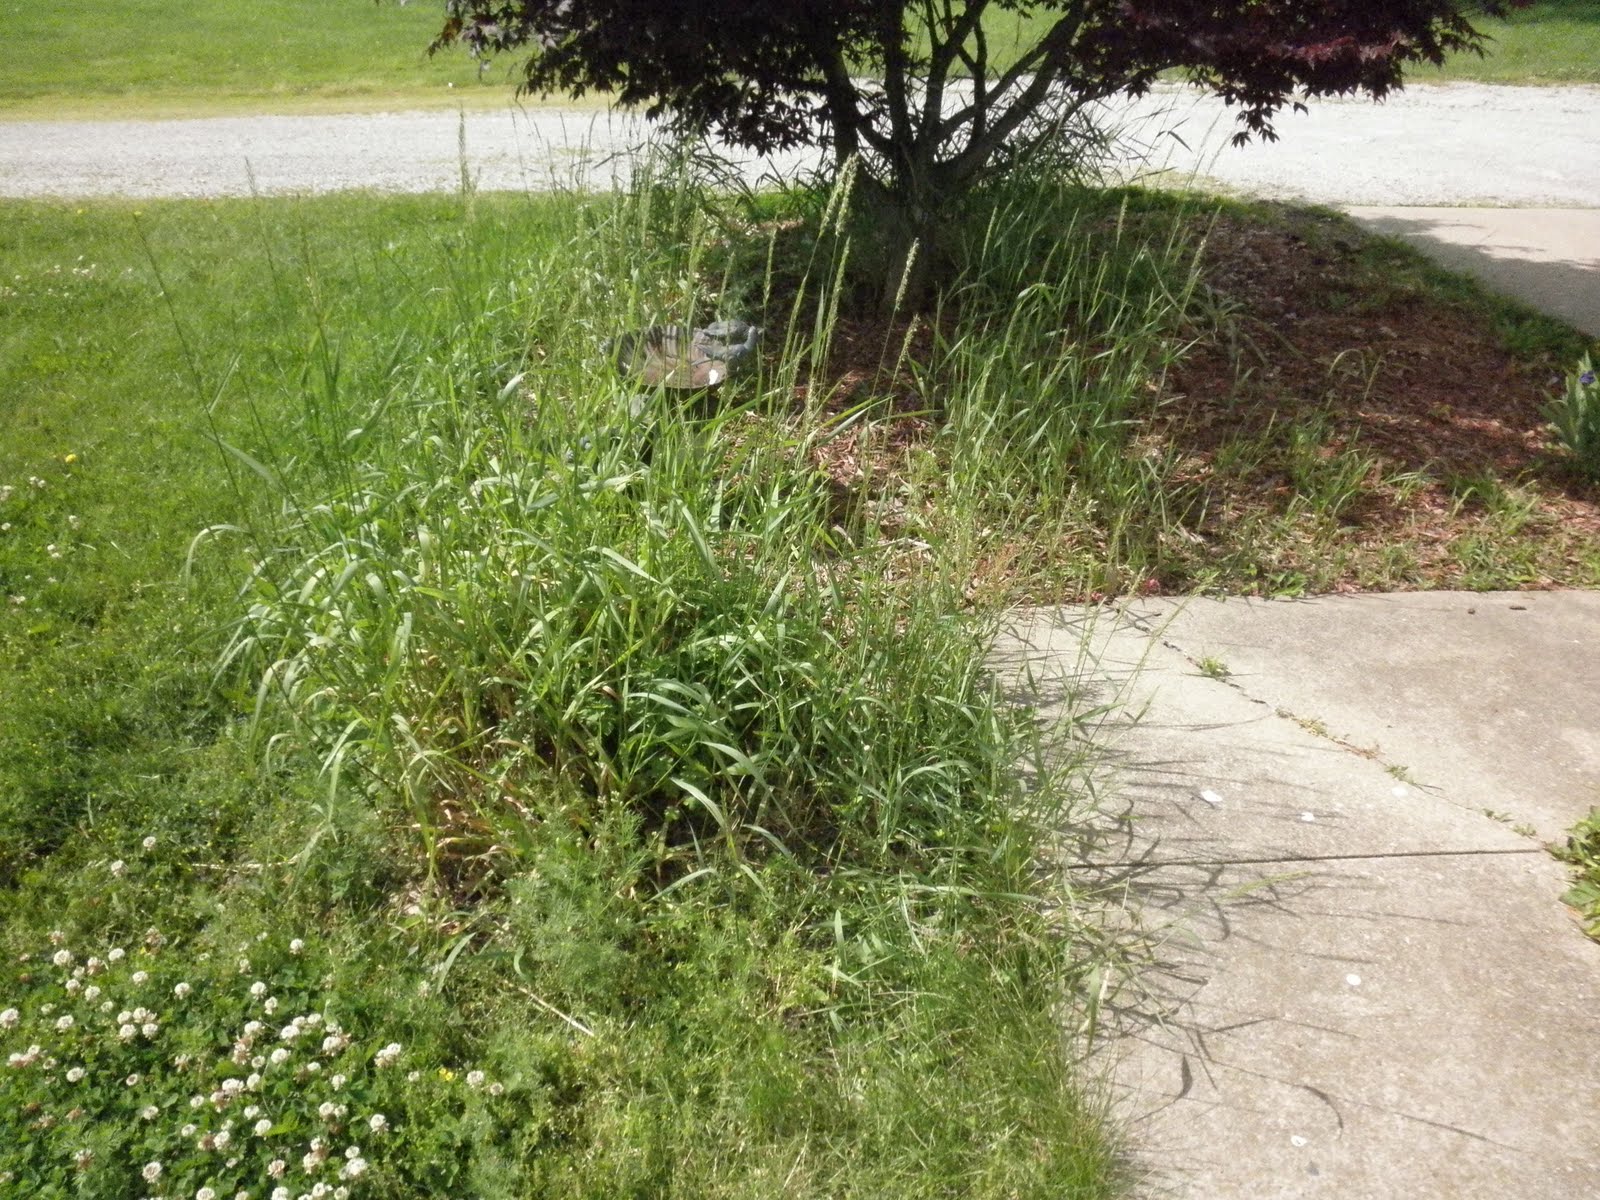


 |
| Two areas for growing veggies...once I reclaim it from the weeds. |

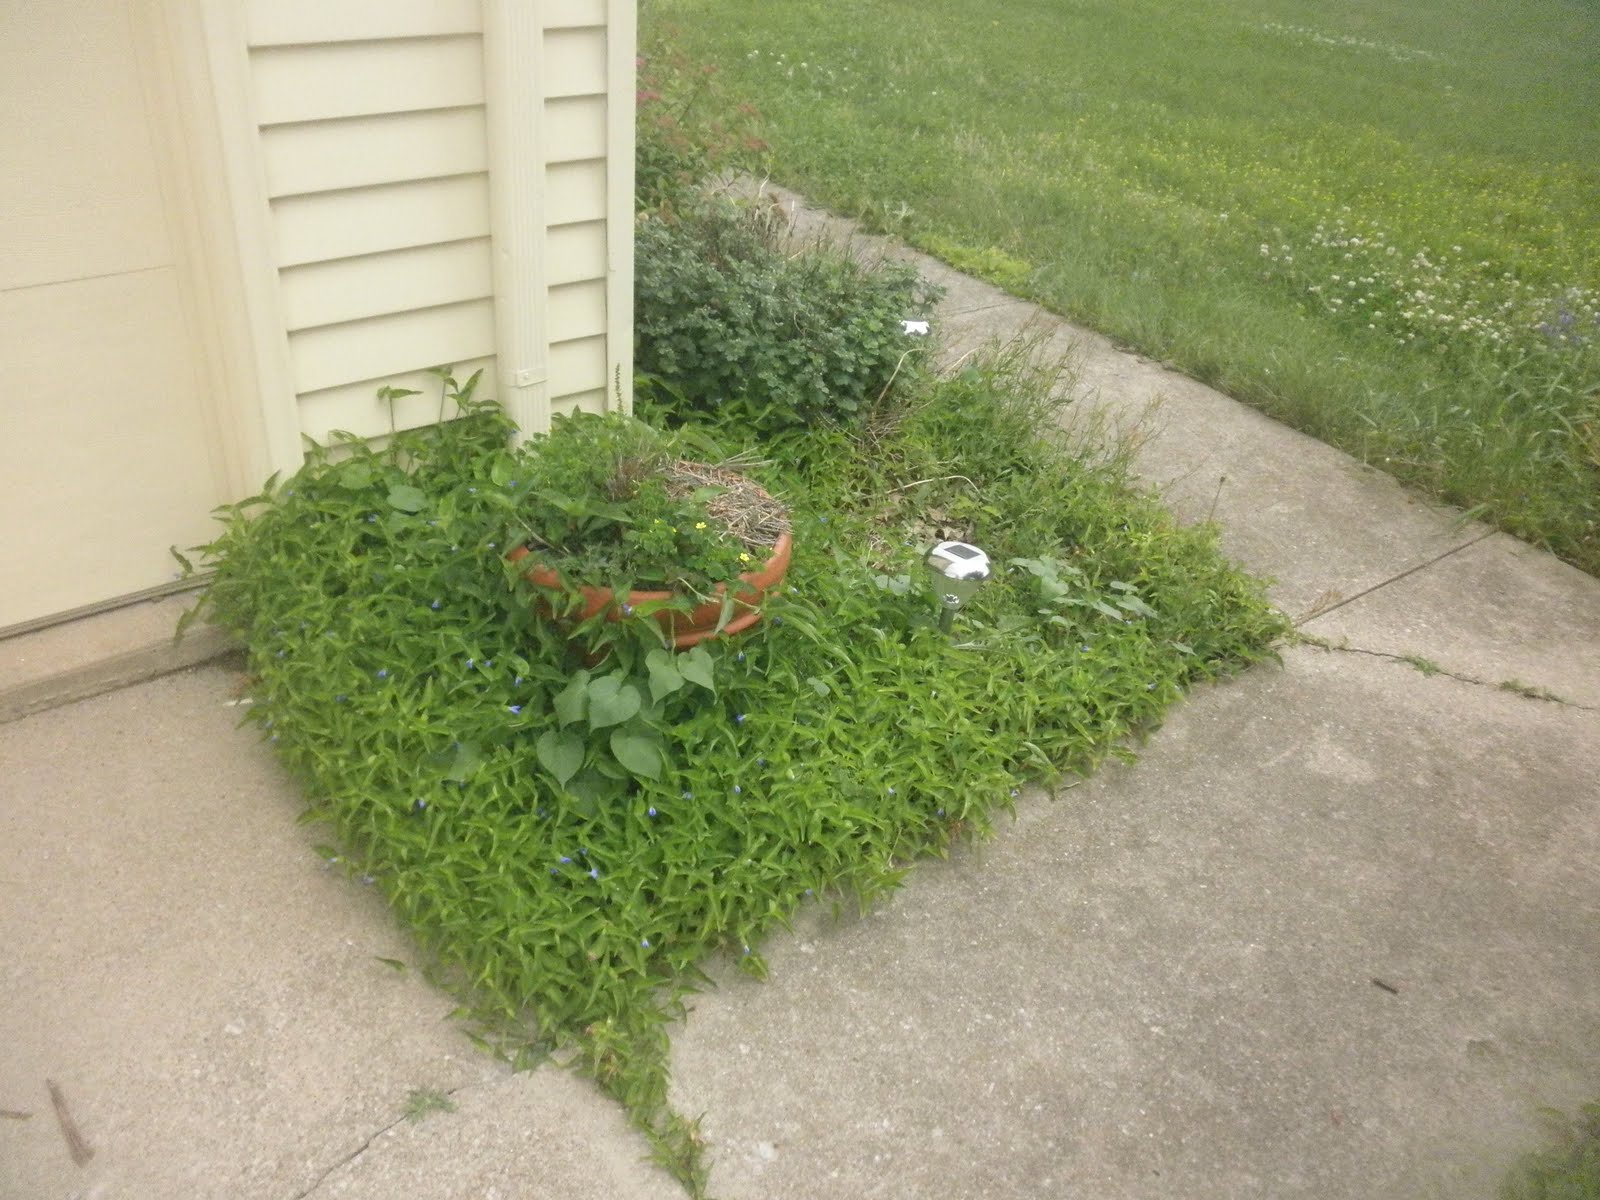


After (only some sections done):

 |
| Close up of Veronica |


 |
| Elderberry |
 |
| Hydrangea |
 |
| Creeping Baby's Breath |
 |
| Butterfly Bush |
 |
| Rosemary, Basil, and Spearmint |
 |
| Cilantro and Parsley |

 |
| Tiger's Eye |
Subscribe to:
Posts (Atom)